Early success with writing, using cutlery, buttoning, and creative making all begins with small muscles—hands, fingers, and wrists working together with eyes and brains. The right tools turn those skills into play, especially when they invite children to pinch, scoop, squeeze, twist, and transfer in ways that feel like a game. That’s the promise of the Learning Resources Helping Hands Fine Motor Tools Classroom Set: a bright, child-forward toolkit that turns everyday moments—sensory bins, small-world play, water trays—into purpose-built practice for dexterity and control.
In this article, we’ll map out how to launch a full fine-motor routine around the Learning Resources Helping Hands Fine Motor Tools Classroom Set. You’ll get an easy center layout, activity ideas that scale across ages and abilities, observation checklists for quick assessment, and management tips that keep everything clean, safe, and ready for learning. We’ll also show you how to weave literacy, numeracy, and science talk into every pinch and pour so the set earns its shelf space all year.
Shop Learning Resources Helping Hands Fine Motor Tools Classroom Set
Why Fine Motor Play Matters (and Why This Set Helps)
Fine motor work builds the pincer grasp, hand strength, bilateral coordination, and wrist stability that underpin pre-writing and everyday independence. The Learning Resources design language—chunky, friendly shapes; satisfying resistance; tactile textures—encourages repeated practice without adult prompts. Children naturally squeeze, twist, and scoop, building stamina in tiny bursts that add up over a term. Because the tools feel like toys, they slot neatly into free-choice time and structured centers alike.
What children experience: success loops. A bead lifted, a pom-pom transferred, a droplet targeted—all deliver instant feedback. That’s what sustains attention, even for learners who typically flit between tasks.
The Classroom Center Setup (Step-by-Step)
Think in stations. Each station rehearses a different movement pattern and offers a clear “win.” Rotate fillers and challenges weekly; keep the tools constant so children build mastery.
- Pinch & Place Station
- Goal: pincer grasp, graded pressure, hand–eye coordination.
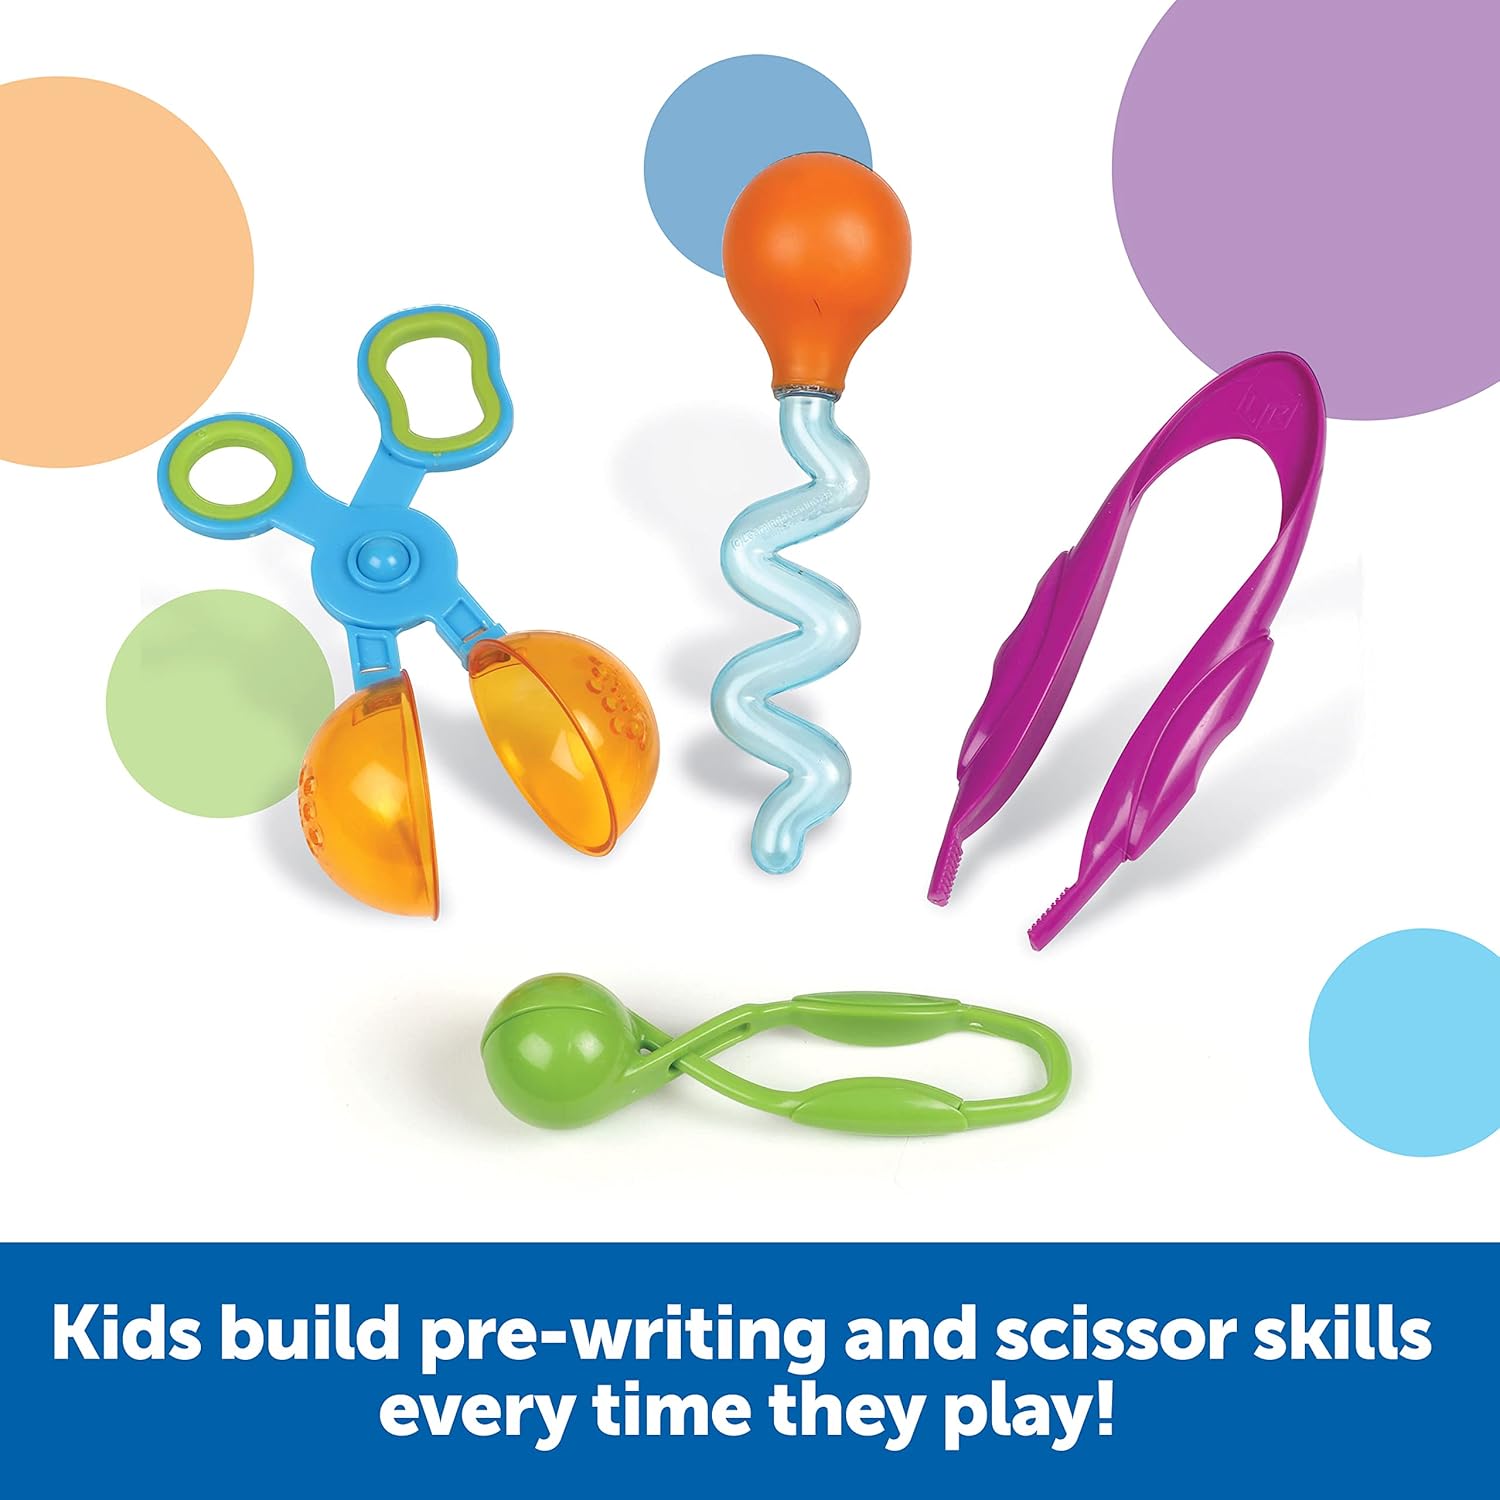
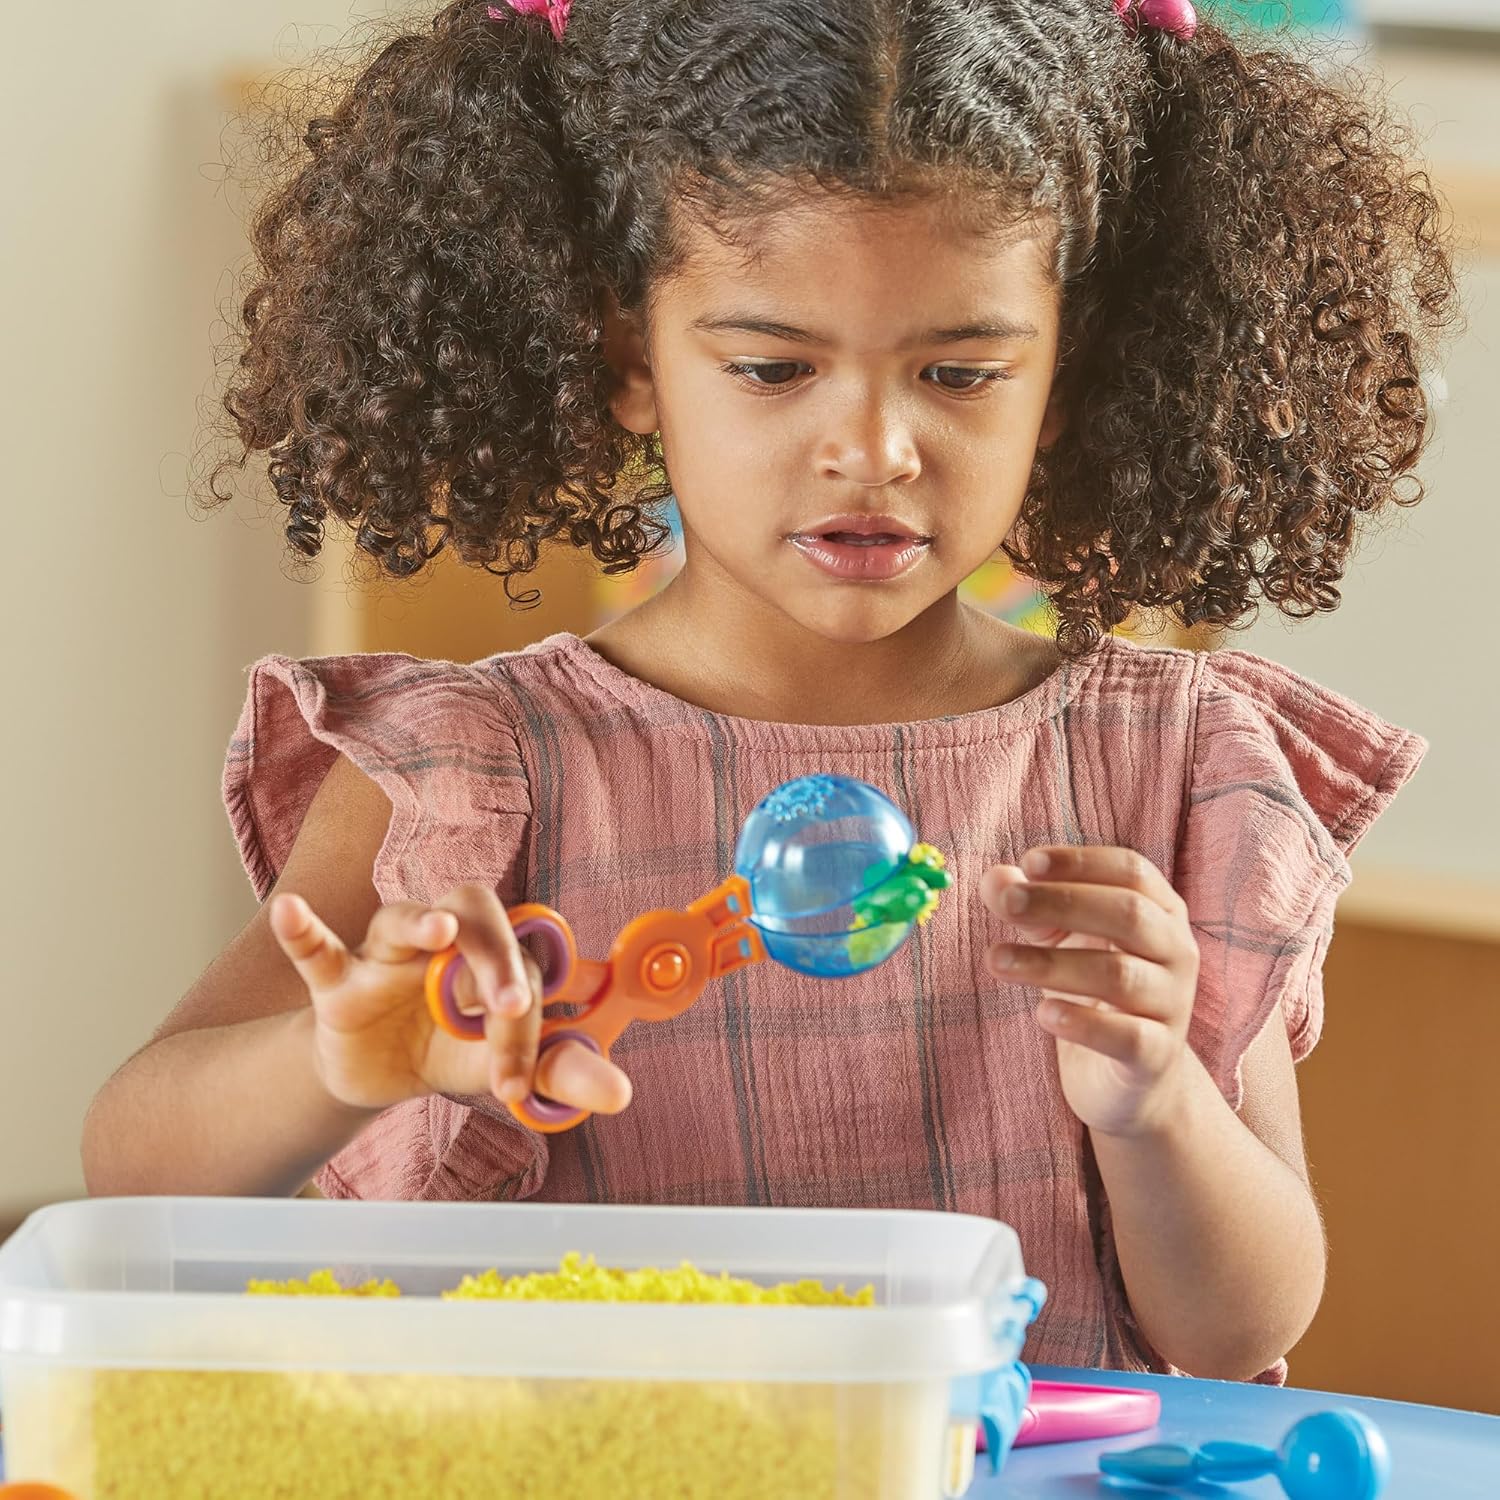
- Tools: grab-and-release tweezers and tongs.
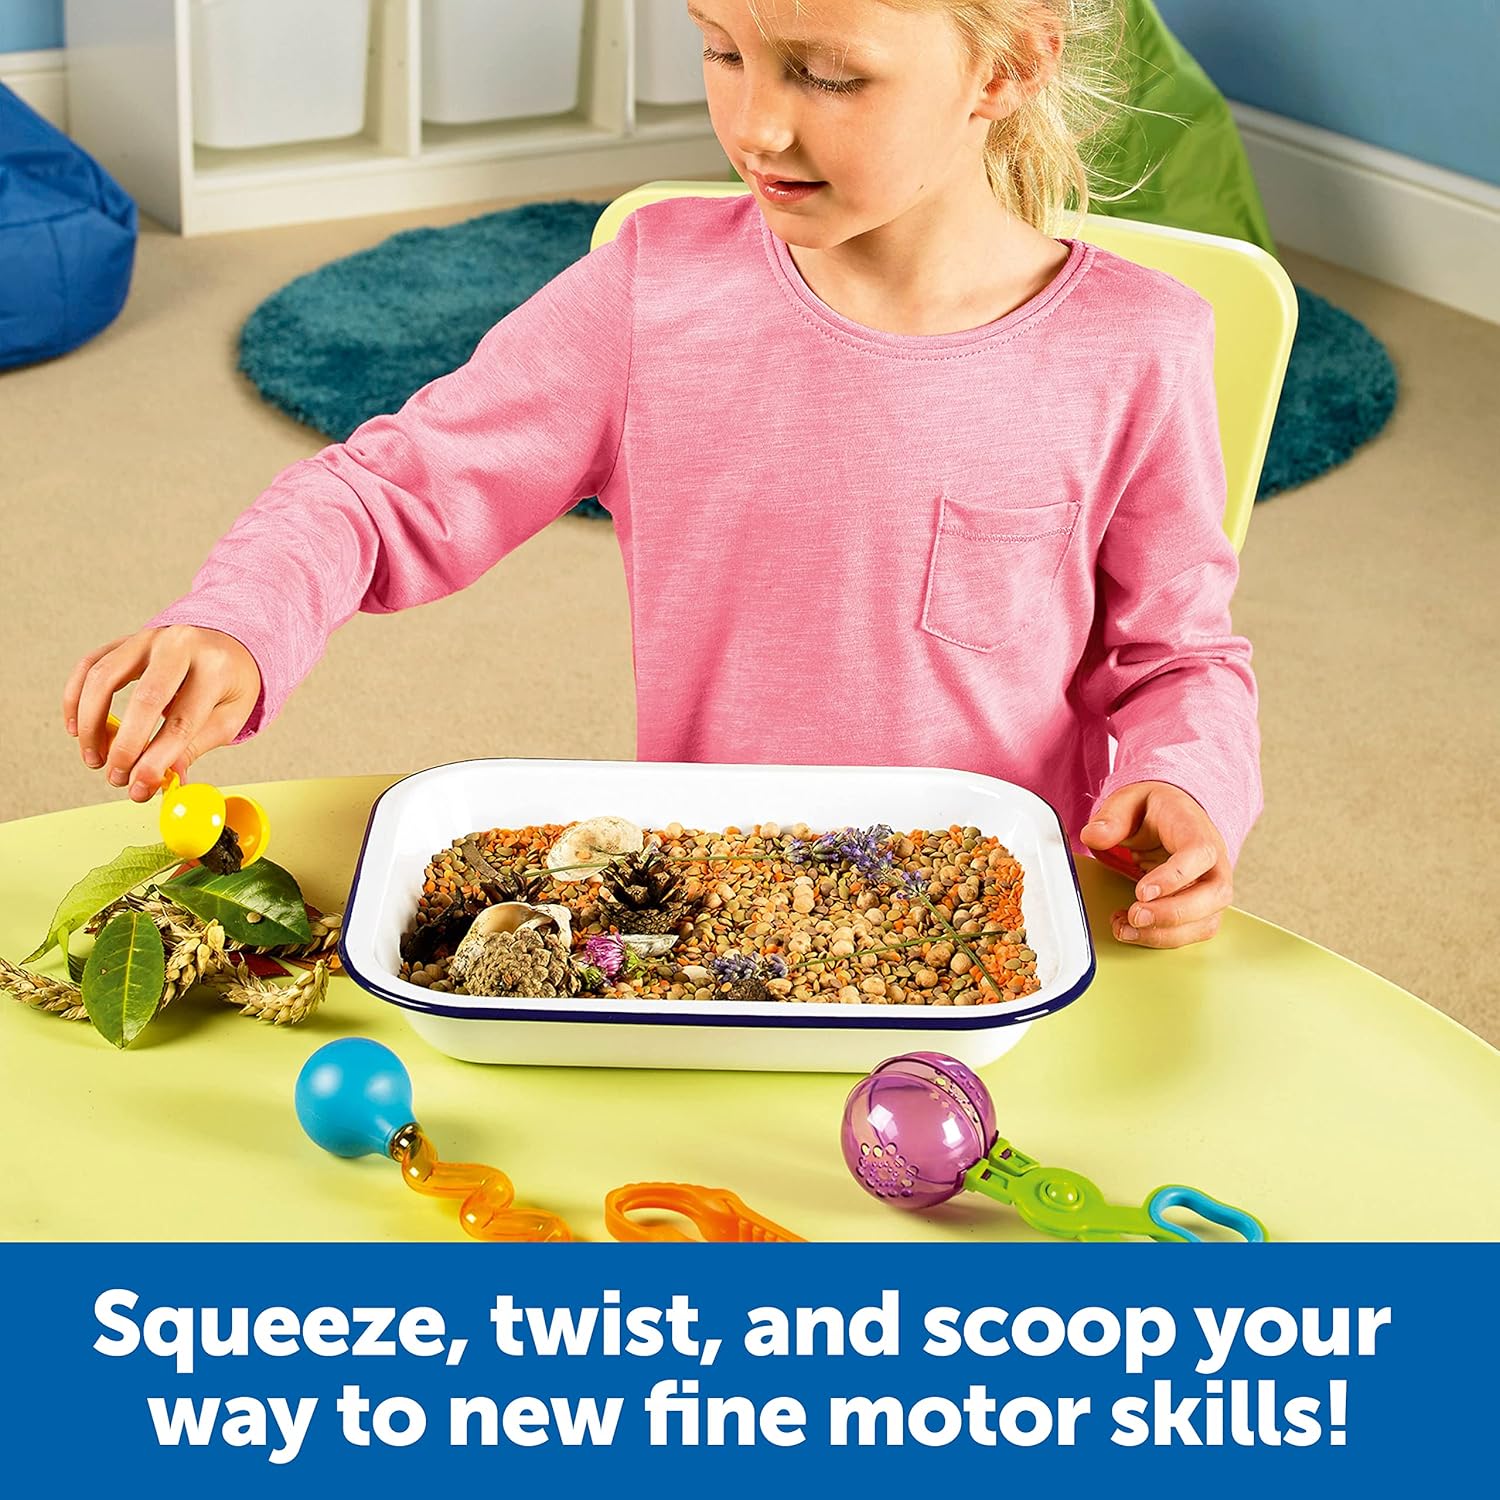
- Provocations: pom-poms, beads, felt dots, mini erasers; ice-cube trays or ten-frames as targets.
- Challenge ladder: from “move any color” → “sort by color/size” → “fill a pattern” → “race a sand timer.”
- Scoop & Pour Station
- Goal: wrist stability, bilateral coordination, graded control.
- Tools: scoops, cups, ladles.
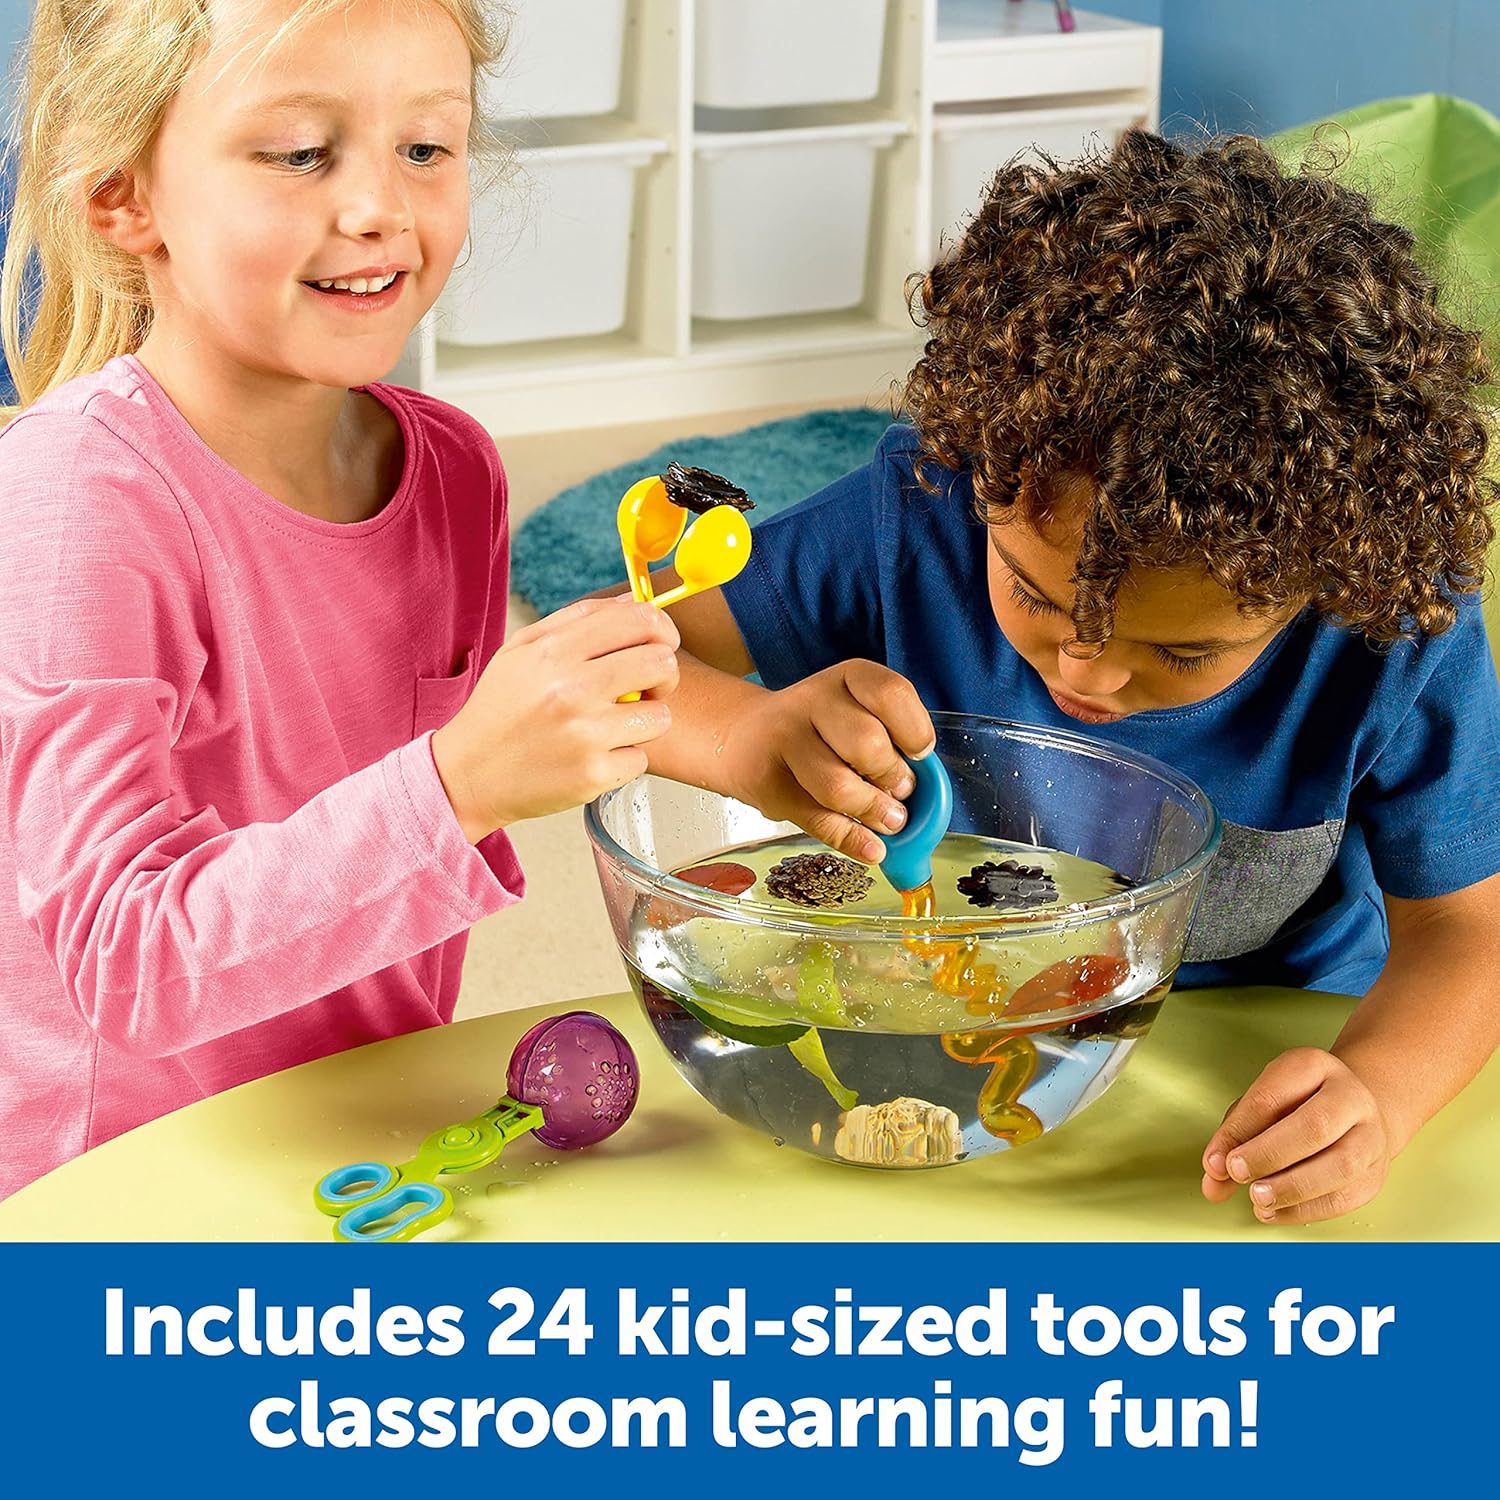
- Provocations: dry rice, pasta, kinetic sand, water with floating lids.
- Challenge ladder: “fill to line” → “transfer without spilling” → “measure five scoops.”
- Squeeze & Release Station
- Goal: intrinsic hand strength, sustained squeeze.
- Tools: bulb droppers, squeeze bottles, scissor-scoops.
- Provocations: water beads in trays, food-colored water onto target circles, cellulose sponges to saturate and wring.
- Challenge ladder: “cover the dots” → “make a path” → “fill the shape outline.”
- Twist & Turn Station
- Goal: forearm rotation (pronation/supination), wrist isolation.
- Tools: twisty tools, screw-top containers, safe twist-to-open puzzles.
- Provocations: hidden picture discs, small tokens to “unlock,” lids with colored dots to match bases.
- Pick, Pack, Post Station
- Goal: sequencing, bilateral work, tool-to-portal accuracy.
- Tools: any grab tool + posting tubes/slots.
- Provocations: mail-the-letter play, “deliver to color-coded houses,” tidy-up races.
Shop Learning Resources Helping Hands Fine Motor Tools Classroom Set
Differentiation that Actually Works
- For emerging grips: start with larger objects (big pom-poms, chunky lids). Add visual borders—bowls with bold rims so success is easy to see.
- For sensory seekers: offer warm/cool water, rice vs. beans, and silicone mats; build tolerance with brief, repeatable tasks.
- For left-handers: present tools at midline; angle trays slightly left; model left-hand use explicitly.
- For learners who rush: use slow media (droppers with colored water), add “pause points” (touch the tray edge before releasing), and set micro-goals (“five drops in the circle”).
- For students ready to stretch: add counting, patterns, and “no-spill” challenges; integrate dice to randomize targets.
Linking to Literacy, Numeracy, and Science Talk
Every action can carry language.
- Literacy: label tubs with simple words and picture cues; narrate verbs (“pinch, place, release”); invite children to tell a “how-to” sequence.
- Phonological play: as children post items, chant onset–rime pairs or initial sounds (p… pinch, p… place).
- Numeracy: count transfers aloud; subitize in ten-frames; compare “more/less,” “heavier/lighter.”
- Science: observe sinking vs. floating, liquid movement from droppers, absorption with sponges; pose “what changed?” questions.
A Four-Week Rotation Plan (Low Prep, High Mileage)
Week 1: Confidence & Curiosity
Introduce two stations only. Keep media simple (dry rice/pom-poms). Teach tool names, model grip, celebrate small wins.
Week 2: Texture Swap
Replace one filler (beans for rice), add posting tubes. Begin color sorting and timed tidy.
Week 3: Add Water Play
Bring in droppers with colored water; introduce “target mats” with circles. Teach cleanup routines (towels, drying racks).
Week 4: Pattern & Measure
Use scoops to “fill to the line;” tweezers to make AB/ABB patterns. Add vocabulary cards (full/empty, heavy/light).
Repeat with new fillers and story contexts; mastery grows as novelty changes.
Observation Checklists & Quick Assessments
Use 30-second sweeps rather than formal tests.
- Grip: thumb and index in opposition? Ring/pinky tucked or splayed?
- Release: controlled placement vs. dropping from height?
- Bilateral use: one hand stabilizes while the other manipulates?
- Endurance: maintains task for 2, then 4, then 6 minutes?
- Accuracy: hits target areas 3/5, then 4/5 times?
- Language: uses action words spontaneously? follows two-step directions?
Jot initials on a mini roster; plan small-group nudges accordingly.
Shop Learning Resources Helping Hands Fine Motor Tools Classroom Set
OT & Home–School Bridges
The set’s versatility makes it ideal for therapists and families. Share “take-home cards” with one tool, one filler, one goal (e.g., “Use droppers to make five green dots on the frog mat”). Encourage families to narrate actions and swap household fillers (dry pasta, buttons, bottle caps) while keeping expectations short and sweet.
Hygiene, Safety, and Storage (The Un-Pretty but Essential Bits)
- Sanitizing cadence: wipe non-porous tools daily; deep clean weekly. Air-dry fully to avoid moisture traps.
- Filler rotation: bin-and-rest system (48–72 hours between uses) or dedicate trays per group.
- Choke-aware choices: match object size to class profile; supervise water and beads closely; use mesh strainers for fast cleanup.
- Storage: clear, labeled containers with picture cues. A color dot on tools and matching dot on tub lids makes reset kid-manageable.
- Repair/retire: if grip resistance is lost or edges nicked, remove and replace. Consistency builds trust.
Ten Low-Prep Activities Children Will Ask For
- Raindrop Targets: droppers + circles on laminated mats; count drops per circle.
- Color Post: sort pom-poms into same-color mailboxes; stamp “delivered.”
- Treasure Rescue: tongs to lift “gems” from kinetic sand; tally on a ten-frame.
- Sponge Squeeze Relay: soak, carry, squeeze into measuring lines; compare volumes.
- Pattern Plates: AB/ABB patterns with tweezers; take a photo and recreate.
- Quiet Pour Café: scoop “beans” into cups to the fill line; serve, then reset.
- Lid Match: twist-on lids with colored dots to match bases; time your twist.
- Rainbow Run: transfer colored water along a path of arrows; keep within lines.
- Button Bakery: tongs to “decorate” felt cupcakes with sequins by number cards.
- Shape Builder: use scoops and cups to outline large shapes on mats; trace with finger to finish.
Shop Learning Resources Helping Hands Fine Motor Tools Classroom Set
Troubleshooting: Common Hurdles & Fixes
- “He just throws the pom-poms.” Offer heavier objects (buttons, pebbles) that provide feedback, then fade back to light items. Add a clear target and countdown.
- “She switches hands constantly.” Place the tray at midline, offer a wrist rest (small beanbag), model the chosen hand, and celebrate short bursts of consistency.
- “The droppers are too hard.” Warm water increases flow; pre-prime droppers; introduce squeeze bottles first to build strength.
- “Stations get messy.” Use trays with rims, tablecloth clips, and a clear reset photo. Assign a “station captain” who checks dots and lids.
- “Short attention spans.” Add story frames (“feed the baby birds five worms”), use sand timers, and offer a tangible finish (stamp, sticker, or photo).
Communicating Progress with Families
Translate observations into plain language: “We’re practicing careful pinching to help with buttons and pencil control,” or “Today your child kept the water drops inside the circle—that control helps with handwriting.” Share a single at-home idea and a celebratory snapshot; parents become allies in the routine.
Conclusion
When fine-motor practice looks and feels like play, children come back for more—long enough to build strength, control, and confidence that spill over into writing, self-care, and making things they’re proud of. The Learning Resources Helping Hands Fine Motor Tools Classroom Set earns its place by being intuitive for children, easy to manage for adults, and flexible across ages, needs, and curriculum goals. Set up a few clear stations, rotate textures and targets, and let repetition do the quiet work. Over time, you’ll see steadier grips, calmer control, and a classroom that treats tiny triumphs as the big milestones they truly are.
Shop Learning Resources Helping Hands Fine Motor Tools Classroom Set
FAQ
- What ages is this set best for?
It suits preschoolers through early primary, with simple tasks for beginners and layered challenges for confident hands. - How many stations should I run at once?
Start with two and grow to four or five as routines stick. Fewer, better stations beat many cluttered ones. - Can I use household fillers instead of specialty media?
Absolutely—dry pasta, buttons, lids, cotton balls, sponges, and colored water all work beautifully. - How do I support children who avoid messy play?
Begin with dry, tidy media and tools that keep hands clean; gradually introduce damp textures with clear opt-in steps. - How often should we rotate activities?
Weekly is ideal: swap a filler or target, keep the tool the same to build mastery. - How do I track progress without formal testing?
Use quick checklists during centers—grip, release, accuracy, stamina—and jot initials with dates. - What’s the best way to encourage proper grip?
Model slowly, offer thumb-on-top cues, and celebrate each accurate pinch or controlled release. - Any tips for inclusion and mixed abilities?
Provide multiple object sizes, varied resistances, and parallel goals so every child can succeed at the same station. - How do I minimize spills and chaos?
Trays with rims, clear finish lines, “station captain” jobs, and a two-minute reset routine keep order. - How can families continue the work at home?
Send a one-tool challenge card (“ten blue drops on the fish”) and suggest common fillers; encourage parents to narrate actions kindly.