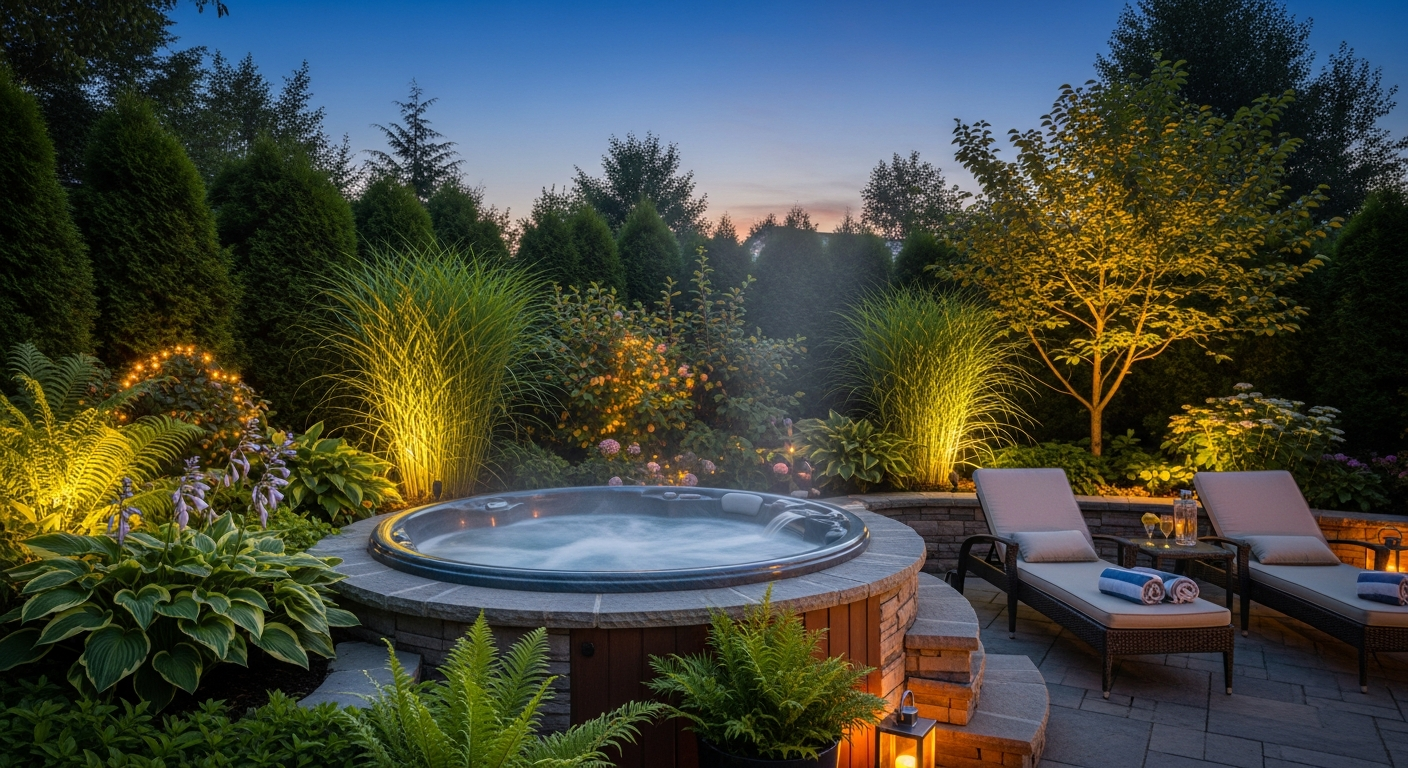

Over 73% of homeowners say their outdoor space has become their primary wellness sanctuary—and a premium hot tub is the fastest way to transform that vision into reality. The luxury of stepping into your own backyard spa, surrounded by the comfort of home, shifts how you approach daily stress relief and physical recovery. It’s no longer a question of whether to invest in wellness, but where that investment happens.
The Home Deluxe Garden Hot Tub isn’t just another inflatable pool. This German-engineered wellness system packs 51 individually adjustable massage jets, chromotherapy lighting, and ergonomic design into a compact footprint that fits intimate outdoor spaces. At CHF 5,399, it represents a serious investment in your health—but one that pays dividends through consistent use and durability.
Discover the Home Deluxe Garden Hot Tub and elevate your outdoor wellness experience today.
What separates satisfied owners from frustrated ones comes down to knowledge. I’ll walk you through everything beyond the glossy marketing: proper installation foundations, electrical requirements that won’t trip your breaker, seasonal maintenance routines that extend lifespan, and practical strategies for getting the most from your hydrotherapy experience. Whether you’re a first-time hot tub owner or upgrading from a basic model, these details matter.
Getting Your Space Ready: Site Preparation & Foundation Requirements
Your hot tub’s longevity begins long before water enters the shell. The ground beneath your unit determines whether you’re soaking in luxury or dealing with structural problems within months.
Assessing Ground Stability and Level Surfaces
A level surface prevents uneven wear on seams and internal components. Even slight slopes cause water to settle unevenly, stressing one section of the shell while leaving another relatively untouched. This inconsistent pressure leads to premature leaks and accelerated material degradation. Use a long straightedge or laser level to check your chosen location. Any deviation greater than 1-2 centimeters requires correction before installation.
Load-Bearing Capacity Calculations
The Home Deluxe Garden Hot Tub designed for two persons weighs considerably more when filled with water and occupants. A standard calculation accounts for:
- Shell and equipment weight: approximately 150-200 kg
- Water capacity: around 1,000-1,200 liters (1,000-1,200 kg)
- Occupants: up to 160 kg per person
- Total potential load: 2,300-2,600 kg concentrated in a relatively small footprint
This concentrated weight demands a firm, compacted base. Soft soil, clay, or loose fill simply won’t support these loads without eventual settling and shifting.
Soil Compaction and Base Materials
Remove the top layer of grass and loose soil. Compact the exposed earth thoroughly using a hand tamper or plate compactor. For areas with poor drainage or questionable soil stability, lay a 10-15 cm gravel bed as your first layer. Crushed stone compacts effectively and allows water drainage away from the unit’s perimeter.
Your final surface can be:
- Concrete pad: Most durable and level, requires professional installation
- Composite decking: Aesthetically pleasing, provides some flex, allows drainage underneath
- Well-compacted gravel with landscape fabric: Most affordable, requires occasional raking and topping
Drainage Planning
Water inevitably splashes over the edge during use. Heavy rain adds additional moisture. Without proper drainage, water pools around your hot tub’s base, promoting mold growth, accelerating foundation degradation, and creating slipping hazards.
Create a gentle slope away from the unit or install a French drain system that channels water 1-2 meters away. Ensure your chosen location naturally sheds water rather than pooling it.
Proximity Considerations
Position your hot tub with clear lines of sight to enjoyable views—but avoid placement directly under trees. Falling leaves, twigs, and pollen constantly load your water, requiring more frequent filter cleaning and chemical adjustments. Position the unit at least 3-4 meters from large trees.
Keep the unit close enough to your electrical outlet that cable runs don’t create trip hazards. However, avoid locations where gutters and downspouts direct roof runoff toward your installation point.
Sunlight Exposure and Shade Planning
Direct afternoon sun heats your water, reducing heating costs during cooler months. However, excessive UV exposure degrades cover materials and accelerates chemical breakdown. Ideally, position your hot tub where it receives morning sun but enjoys afternoon shade from a pergola, shade structure, or mature trees positioned to the west.
This balance keeps heating costs reasonable while protecting materials from degradation.
Space Clearance Requirements
You’ll need at least 60-90 centimeters of clearance on all sides for accessing jets, adjusting equipment, and performing maintenance. If you plan to access the underside or service components, account for additional space. Mark these boundaries before finalizing your placement.
Electrical Installation: Meeting Home Deluxe Specifications Safely
The power requirements for your hot tub exceed standard household circuits. Improper electrical setup risks fires, electrocution, and equipment damage. This is the one area where DIY shortcuts create genuine danger.
Understanding the 3 x 6 mm Cable Requirement
Home Deluxe specifies a connection cable with a minimum cross-section of 3 x 6 mm. This isn’t arbitrary—it reflects the amperage draw and safety margins necessary for safe operation. Your standard household wiring (typically 2.5 mm cross-section) cannot safely carry this load. Using undersized cable causes resistance heating, which melts insulation and creates fire hazards.
The “3 x 6 mm” designation means three conductors, each 6 square millimeters in cross-sectional area. This accommodates the hot tub’s electrical demands while maintaining the safety factor your household electrical code requires.
Working with a Licensed Electrician
Contact a certified electrician before purchasing your hot tub. They’ll assess your home’s main electrical panel, evaluate available capacity, and determine whether your service can support a new high-draw circuit. Many residential installations require upgrading to a larger service panel—a significant but necessary investment.
Your electrician will run the properly sized cable from your main panel directly to the hot tub’s connection point. This dedicated circuit ensures uninterrupted power and prevents competition with other household appliances.
Circuit Breaker Sizing and Dedicated Lines
Your hot tub requires its own dedicated circuit breaker, typically 40-60 amps depending on the specific model and heating elements. This breaker must be properly sized to protect the circuit from overload while allowing normal operation. An undersized breaker trips constantly; an oversized breaker provides insufficient protection.
The electrician calculates the required amperage based on the hot tub’s heating elements, pump motor, and control systems. They’ll install the appropriate breaker and ensure no other circuits branch from this dedicated line.
Grounding and Safety Protocols
Outdoor electrical installations in wet environments demand rigorous grounding to prevent electrocution. Your electrician will install:
- Proper grounding rods driven into stable earth
- Ground fault circuit interrupter (GFCI) protection
- Bonding connections between the hot tub shell, equipment frames, and grounding system
These measures create a safe electrical environment even if component failures or moisture infiltration occurs.
Cost Estimates for Professional Electrical Setup
Expect to budget CHF 800–2,500 for professional electrical installation, depending on your home’s existing infrastructure. If your service panel requires upgrading, costs escalate significantly. Permit fees vary by region but typically range from CHF 100–400.
This is where corners cannot be cut. Proper installation protects your investment and your family’s safety.
Testing Procedures Before First Use
Once installation is complete, your electrician will test the system before you add water. This includes:
- Verifying proper voltage delivery to the hot tub connection
- Testing GFCI functionality by simulating a fault condition
- Confirming grounding resistance meets code requirements
- Running the pump and heating elements at no-load to ensure stable operation
Never fill your hot tub until these tests pass and the electrician provides written certification.
Weatherproofing Connections and Cable Management
Your cable runs outdoors and faces sun, temperature swings, and moisture. Use weatherproof cable conduits to protect the connection cable from UV degradation and physical damage. Route cables along fences or attach them to your home’s exterior, keeping them well away from foot traffic and potential damage points.
Inspect these connections seasonally. Look for cracks in conduit, loose fasteners, or exposed copper—all indicators that weatherproofing has failed.
Mastering the 51-Jet Hydrotherapy System: Customization & Benefits
The 51 individually adjustable massage jets distinguish the Home Deluxe Garden Hot Tub from basic models. Understanding how to customize them transforms your soaking experience from pleasant to genuinely therapeutic.
Individual Jet Intensity Adjustment Techniques
Each jet features its own control valve. Turning the valve clockwise increases water pressure through that jet; counterclockwise decreases it. Begin with all jets set to moderate intensity—approximately half-open. This prevents overwhelming your nervous system while you learn the system’s capabilities.
Gradually increase intensity on specific jets as your muscles acclimate. Aggressive jets feel shocking initially; gentle progression allows your body to adapt and actually benefit from deeper pressure.
Directional Jet Positioning
Most jets can be angled by gently twisting them—typically within a 30-45 degree range. Point jets directly at muscle tension areas for maximum therapeutic benefit. Neck jets should aim upward and slightly forward to reach the cervical spine’s base. Lower back jets point horizontally or slightly upward to target the lumbar region and glutes.
Experiment with angles during your first few sessions. What feels effective varies based on your body’s specific anatomy and tension patterns.
Combining Jet Patterns for Personalized Sequences
Don’t activate every jet simultaneously. Instead, focus on specific zones:
- Neck and shoulders: Activate jets directed at the upper back and neck area while keeping leg jets at minimal intensity
- Lower back and glutes: Run lower back jets at higher intensity with leg jets set moderately
- Full-body relaxation: Use all jets at moderate-to-low intensity for a gentler, longer session
Rotating through these patterns prevents habituation—your nervous system adapts to constant stimulation, reducing the therapeutic effect. Varying your jet sequences maintains the sensation of novelty and effectiveness.
Hydrotherapy Benefits: Improved Circulation, Muscle Recovery, and Stress Reduction
The sustained pressure and warmth from hydrotherapy increase blood flow to muscle tissues, delivering oxygen and nutrients while removing metabolic waste products. This accelerates recovery after workouts or physically demanding days.
The massage action also stimulates mechanoreceptors in your skin and muscle tissue, sending signals to your nervous system that promote relaxation. Regular hydrotherapy sessions measurably reduce cortisol levels and improve sleep quality.
Athletes report faster recovery from training sessions. People managing chronic pain conditions experience genuine relief. The therapeutic benefits extend beyond momentary relaxation.
Recommended Session Durations and Frequency
Start with 15-20 minute sessions, 2-3 times per week. This frequency allows your body to adapt without excessive heat stress. As your tolerance builds, gradually extend sessions to 30-40 minutes.
Longer sessions don’t automatically produce better results. Your body reaches peak relaxation and therapeutic benefit around 30-40 minutes. Beyond that, diminishing returns set in and heat stress on your cardiovascular system increases.
Listen to your body. If you feel lightheaded, dizzy, or excessively fatigued after sessions, reduce duration or frequency.
Adjusting Water Temperature to Enhance Therapeutic Effects
Temperature dramatically influences therapeutic benefit. Cool water (around 35°C) energizes and invigorates; warm water (38-40°C) promotes deep relaxation and muscle recovery. Most users prefer 38-39°C for extended sessions.
Never exceed 40°C—this temperature stresses your cardiovascular system and can trigger dizziness or fainting. The Home Deluxe unit won’t operate below 5°C, which ensures your system never freezes during cold months.
Temperature control allows you to customize sessions based on your goals: energizing morning soaks versus wind-down evening relaxation.
Jet Maintenance Schedules to Prevent Clogging
Mineral deposits and organic debris gradually accumulate inside jet lines. This reduces pressure and eventually causes jets to fail. Flush your jet lines monthly by running the system for 15-20 minutes without chemical additives (pure water only if possible, or very low-chlorine water).
Some users benefit from using a jet line cleaner designed for hot tubs—products that dissolve mineral buildup. Follow the manufacturer’s instructions carefully, and run a full water flush after chemical treatment to ensure no residual cleaning agents remain.
Chromotherapy Lighting: Creating Your Personal Spa Atmosphere
The 24 integrated light sources do more than create ambiance. Color light therapy engages psychological and physiological responses that enhance relaxation and support wellness goals.
How 24 Light Sources Enhance Relaxation and Mood Regulation
Rather than a single harsh overhead light, the distributed lighting design surrounds you with gentle illumination. This mimics sunset lighting, which naturally triggers relaxation responses in your nervous system.
The multiple light sources also distribute heat more evenly around the tub’s interior, creating a more immersive sensory experience than you’d receive from a traditional spa.
Color Light Therapy Principles and Wellness Goals
Different color wavelengths trigger different physiological responses:
- Blue: Calms the nervous system, supports sleep preparation, reduces anxiety
- Green: Balances mood, promotes healing, reduces inflammation perception
- Red: Stimulates circulation, energizes, supports muscle recovery
- Purple/Violet: Enhances creativity, supports meditation, balances energy
- Yellow/Amber: Uplifts mood, increases alertness, supports digestive function
Evening soaks benefit from blue and green lighting. Morning sessions might incorporate red or yellow to energize. Your chromotherapy system typically cycles through preset sequences or allows manual color selection.
Adjusting Lighting Intensity and Color Sequences
Most Home Deluxe units offer multiple intensity levels and either automated cycling or manual selection. Start with lower intensity—bright lighting counteracts the relaxation response you’re trying to achieve. Medium intensity typically creates the most immersive, therapeutically effective experience.
Experiment with different colors during various times of day and for different purposes. Track which combinations most effectively support your wellness goals.
Combining Lighting with Jet Therapy for Immersive Sessions
The synergy between tactile hydrotherapy and visual/chromotherapy creates deeper relaxation than either alone. A blue-lit evening session with moderate jet intensity promotes better sleep. A red-lit morning soak with invigorating jets energizes your day.
Creating these intentional combinations transforms your hot tub from a pleasant luxury into a targeted wellness tool.
Energy Efficiency of LED Systems and Operating Costs
Modern LED lighting draws minimal power—typically 5-10 watts for the entire 24-light system. This adds negligible cost to your operating expenses. Running the lights for a one-hour soak costs mere cents in electricity.
LED systems also produce less heat than traditional incandescent bulbs, which actually helps your heating system work more efficiently by not adding unwanted thermal load.
Lighting Maintenance and Bulb Replacement
LED bulbs typically outlast the hot tub itself, with rated lifespans of 50,000+ hours. If individual lights fail, replacement is straightforward—most systems use standard LED bulbs that you can source from hardware retailers.
Occasionally clean the light fixtures with a soft, damp cloth to remove mineral deposits or algae growth. This maintains optimal brightness and color saturation.
Creating Evening Ambiance Versus Solo Relaxation Sessions
For social gatherings, use higher lighting intensity with color cycling—this creates visual interest and a spa-resort atmosphere. For solo relaxation or sleep preparation, select a single calming color (blue or green) at medium-to-low intensity.
Different occasions benefit from different lighting strategies. The flexibility of your chromotherapy system supports both social enjoyment and therapeutic wellness sessions.
Winterization & Seasonal Care: Protecting Your Investment Year-Round
Winter poses the greatest threat to hot tub longevity. Freezing water expands, cracking pipes, damaging valves, and destroying internal components. Proper winterization is non-negotiable if you live in climates where temperatures regularly drop below 5°C.
Draining Procedures When Temperatures Approach Freezing
Complete draining is essential once your region’s temperature forecast shows sustained freezes approaching. Partial draining leaves water in pipes and components where freezing causes catastrophic damage.
The draining process:
- Turn off all electrical systems and heating
- Locate the main drain valve (typically near the pump)
- Attach a standard garden hose and direct water away from your home’s foundation
- Open the drain valve fully and allow complete emptying—this takes 2-4 hours depending on capacity
- Open all air vents and jet valves to release trapped water
- Leave drain valve open to allow any remaining water to exit
Do not leave your hot tub partially filled—this creates the exact conditions where freezing damage occurs.
Step-by-Step Winterization Checklist
Beyond draining, complete winterization includes:
- Turn off all equipment: Pump, heater, blower, and lighting systems should be off
- Disconnect power: If safe to do so, turn off the circuit breaker (though most prefer to leave systems on standby)
- Remove the cover and allow air circulation: This prevents moisture accumulation under covers
- Open all access panels: Jets, vents, and component access points should be open to air
- Leave drain valves open: This allows any residual water to exit as temperatures fluctuate
- Protect from debris: While leaving components accessible, shield the interior from leaves and heavy debris with a loosely fitting cover or screening
Storing Removable Parts During Off-Season Months
Your black headrests can be removed and stored in a dry location—this prevents UV degradation and maintains their structural integrity. Filter cartridges should be cleaned thoroughly, dried completely, and stored in a cool, dry place.
Any removable equipment—remote controls, additional accessories, or spa chemicals—should be stored indoors where temperature and humidity remain controlled.
Reopening Your Hot Tub in Spring: Flushing Lines, Refilling, and System Checks
Spring restart requires systematic attention:
- Inspect for winter damage: Look for visible cracks, loose fittings, or deterioration
- Clean the interior thoroughly: Use a soft brush to remove any algae growth or debris accumulated during dormancy
- Close all drain valves and vents: Prepare the system to hold water
- Refill slowly and monitor for leaks: Add water gradually while watching for any signs of leakage
- Run the pump briefly without the heater: This flushes air from lines and builds water pressure
- Once water is circulating, check all jets: Ensure each jet flows properly
- Test the heater: Allow the system to warm the water to your preferred temperature
- Balance chemicals: Test pH and alkalinity, then add appropriate chemicals to reach target levels
- Run through a full cycle: Operate all systems (pump, heater, jets, lighting) for 30-60 minutes to confirm everything functions
This methodical approach catches problems early before they become serious issues.
Chemical Balance Across Seasonal Temperature Fluctuations
Cold temperatures slow chemical reactions. Water holds chlorine longer in winter but pH fluctuates more dramatically as temperature changes. During spring and fall transitions, test water chemistry more frequently—weekly rather than bi-weekly.
Different seasons may require different chemical approaches. Early spring often requires chlorine boosts due to algae growth accelerated by warming water temperatures.
Cover Selection and Securing Methods
Your hot tub requires protection from debris year-round. Invest in a fitted cover designed for your specific dimensions—the Home Deluxe’s 215 x 163 cm footprint requires a cover matching these measurements.
Quality covers feature:
- Thermal insulation: Reduces heating costs
- UV protection: Prevents degradation of cover material and underlying components
- Water drainage features: Allows rain to shed rather than pooling
- Secure fastening points: Prevents wind from displacing the cover
Secure your cover with tie-down straps during windy conditions. An unsecured cover won’t protect your investment if high winds flip it aside.
Regional Climate Considerations and Extended Shutdown Protocols
Climates with extreme winter conditions may benefit from extended seasonal shutdown rather than winterization. If your region experiences sustained temperatures well below 5°C for months, draining and winterizing makes more sense than attempting to maintain the system through extended freezing.
Conversely, mild climates where freezing is rare can maintain operation year-round with standard winterization precautions. Your local climate dictates your strategy.
Daily & Monthly Maintenance Routines: Keeping Water Clean & Clear
Between seasonal deep maintenance, consistent daily and monthly care keeps your water inviting and your equipment functioning optimally.
Water Testing Frequency and pH, Alkalinity, Chlorine Level Targets
Test water chemistry weekly during regular use seasons. The Home Deluxe system maintains better chemical stability than inflatable pools, but regular testing is still essential.
Your target ranges:
- pH: 7.2–7.8 (neutral to slightly alkaline)
- Total alkalinity: 80–120 ppm
- Free chlorine: 1–3 ppm (or alternative sanitizer levels if using bromine)
These ranges ensure water safety, clarity, and comfort. Testing kits are inexpensive and simple to use—liquid test kits provide more accuracy than strip tests.
Filter Cleaning Schedules and Cartridge Replacement
Your filter traps particles and debris that cloud water and promote bacteria growth. Rinse your filter cartridge every 2-4 weeks with a garden hose, directing water down the pleats to flush trapped debris.
Replace the entire cartridge every 2-3 years depending on usage frequency and water clarity. A filter past its effective lifespan simply won’t maintain clarity no matter how often you rinse it.
Skimming Debris and Managing Organic Buildup
Use a skimmer net to remove floating leaves, insects, and debris from the water surface. Daily skimming prevents organic material from breaking down in your water, which depletes chlorine reserves and promotes algae growth.
This simple 2-minute daily task prevents accumulation that eventually requires draining and refilling to correct.
Jet Line Flushing to Prevent Mineral Deposits and Bacterial Growth
Monthly jet line flushing (as discussed earlier) prevents mineral accumulation and maintains consistent jet pressure. This preventive maintenance is far simpler than dealing with clogged jets.
Headrest Cleaning and Sanitization Between Uses
Your black headrests contact your face, neck, and hair directly. Wipe them down with a clean cloth after each use, and sanitize weekly with a dilute chlorine solution (1 part chlorine to 10 parts water). Rinse thoroughly before reusing.
This prevents bacterial and fungal growth that causes skin irritation.
Monitoring Water Clarity and Troubleshooting Common Cloudiness Issues
Clear water indicates proper chemical balance and filtration. Cloudy water suggests:
- Low chlorine: Test and adjust to 1-3 ppm range
- High pH: Lower pH to 7.2–7.6 range
- Clogged filter: Rinse or replace as needed
- High bather load: More people in the tub simultaneously depletes chemicals faster
Identifying the cause allows you to correct the issue rather than defaulting to complete draining.
Chemical Storage Safety and Disposal Guidelines
Store all chemicals in cool, dry locations away from sunlight. Keep chlorine separate from alkalinity adjusters—mixing these creates safety hazards.
Never mix chemicals directly in the tub. Always dilute adjusters in water first, then add slowly to the tub. Follow product instructions precisely.
When disposing of old chemicals, contact your local waste management authority—these aren’t standard household trash items.
Maximizing Comfort: Headrest Design & Relaxation Positioning
The ergonomic headrests aren’t merely aesthetic—they fundamentally enhance comfort and enable different relaxation strategies.
Ergonomic Benefits of the Black Headrest Design
The contoured headrests support your neck at the correct angle, preventing the strain that develops when your head rests unsupported on the tub’s edge. This design allows 45-60 minute sessions without neck fatigue.
The black color also serves a practical purpose—it hides mineral deposits and algae growth that appear obvious on lighter materials, making headrests easier to maintain visually while you relax.
Sitting Versus Reclining Positions and Targeted Muscle Groups
Sitting position: Feet on the tub floor, torso upright, headrest supporting your neck and upper back. This positions jets to target your neck, shoulders, upper back, and mid-back. Sitting allows for shorter sessions (15-20 minutes) before standing becomes necessary.
Reclining position: Back against the tub wall with headrest fully supporting your head, legs extended or bent at the knees. This exposes your entire back, glutes, and legs to jet therapy. Reclining allows longer, deeper sessions (30-40 minutes) because your muscles fully relax without postural effort.
Alternating between positions during a single session distributes massage effects across your entire body.
Adjusting Body Positioning to Optimize Jet Contact
Rather than remaining static, micro-adjust your position throughout your session. Slightly shift forward to expose different back muscles. Rotate your shoulders to angle jets differently across your upper back. These small movements ensure comprehensive coverage rather than repetitive stimulation of the same areas.
Using Headrests for Solo Relaxation Versus Couples’ Experiences
Solo sessions allow you to occupy the optimal position for your specific tension patterns. You can sprawl across the tub if you prefer, using both headrests or positioning yourself to fully exploit the jet distribution.
Couples’ sessions require sharing. Plan for alternating positions so both partners benefit equally. Some couples prefer synchronized relaxation at lower jet intensities; others rotate active session time.
Cleaning and Maintaining Headrest Material for Hygiene and Durability
Wipe headrests with a clean cloth immediately after use while they’re still damp—this prevents mineral deposits from hardening. Weekly sanitization with dilute chlorine prevents bacterial growth.
The material is durable and resists UV degradation better than untreated plastic, but direct sunlight still accelerates aging. Use your cover to shade the tub when not in use.
Accessory Options for Enhanced Comfort
Third-party accessories—additional cushions, neck supports, or therapy pillows—can further customize comfort. Some users find a rolled towel beneath their knees reduces strain during extended reclined sessions. Others benefit from a small pillow under their lower back.
Experiment with additions that enhance your personal comfort without interfering with jet access.
Temperature Considerations When Using Different Relaxation Positions
Heat rises. During extended sessions, your head and neck—highest in the water—experience more heat exposure than your lower body. If temperature feels uncomfortable, slightly lower your body position or reduce water temperature by 1-2°C.
Conversely, if your lower body feels inadequately heated during reclined sessions, higher water temperatures (39-40°C range) ensure full-body comfort.
Cost-Benefit Analysis: Is the Home Deluxe Garden Hot Tub Worth CHF 5,399?
The CHF 5,399 investment is substantial. Understanding the financial and health returns justifies this commitment.
Comparing Ownership Costs Against Annual Spa Memberships and Resort Visits
A typical spa membership costs CHF 1,200–2,400 annually with limited access hours. Resort spa visits easily reach CHF 150–300 per session. A couple visiting a spa monthly spends CHF 3,600–7,200 yearly.
Your hot tub amortizes over five years:
- Year 1: CHF 5,399 + CHF 500 (installation) + CHF 400 (chemicals/electricity) = CHF 6,299
- Years 2-5: CHF 400–600 annually in maintenance
Over five years, total ownership costs approximately CHF 8,500. Five years of monthly spa visits for a couple exceeds CHF 18,000. The hot tub breaks even against spa memberships by year 2-3.
Installation Expenses Beyond the Unit Cost
Your CHF 5,399 covers the hot tub shell and equipment. Additional first-year expenses include:
- Electrical installation: CHF 800–2,500
- Foundation preparation: CHF 300–1,000
- Cover and accessories: CHF 300–600
- Initial chemicals and testing kit: CHF 100–200
- Permits and inspections: CHF 100–400
Total first-year cost: CHF 7,500–10,500 before ongoing operations.
Ongoing Operational Costs
Monthly operating expenses break down approximately:
- Electricity: CHF 60–100 (depending on heating frequency)
- Chemicals: CHF 30–50
- Maintenance supplies: CHF 10–20
- Filter replacement (annually): CHF 50–80
Annual ongoing costs: CHF 1,200–2,000.
Long-Term Health Benefits and Potential Medical Expense Reductions
Regular hydrotherapy users report:
- Improved sleep quality: Reducing sleep disorder costs or sleep aid expenses
- Reduced chronic pain: Potentially decreasing pain medication needs
- Faster athletic recovery: Extending athletic career longevity
- Lower stress levels: Reducing stress-related health conditions
Quantifying these benefits is difficult, but a person who eliminates monthly massage therapy appointments (CHF 100–150) recovers CHF 1,200–1,800 annually. Reduced pain medication or sleep aids represent additional savings.
Property Value Enhancement and Resale Appeal
Homes with luxury amenities like hot tubs appeal to affluent buyers and often command premium resale values. While a hot tub may not directly increase property value by the installation cost, it definitely enhances market appeal and buyer perception of the property as well-maintained and luxurious.
Financing Options and Payment Plans
Some retailers and financial institutions offer payment plans that spread the CHF 5,399 cost across 12-36 months, often with competitive interest rates. This transforms the investment into a monthly expense (CHF 150–450 depending on terms) that may align better with household budgets.
ROI Timeline Based on Usage Frequency and Family Wellness Priorities
Your return on investment depends entirely on usage:
- Frequent users (4-5 sessions weekly): Break-even against spa memberships by year 2-3, with significant health benefits realized
- Moderate users (2-3 sessions weekly): Break-even by year 3-4, meaningful health improvements
- Occasional users (1-2 sessions weekly): Break-even by year 4-5, still worthwhile if wellness is a priority
Be honest about realistic usage. A hot tub purchased with enthusiasm that gets used twice monthly never delivers ROI. Conversely, an investment matching your actual wellness priorities delivers years of reliable enjoyment and genuine health benefits.
Troubleshooting Common Issues: Solutions for New Owners
Even well-maintained hot tubs occasionally present challenges. Knowing how to diagnose and address common issues prevents panic and unnecessary service calls.
Electrical Tripping or Power Interruptions
If your circuit breaker trips immediately when powering on the hot tub:
- Check that nothing else is running on the same circuit
- Verify all connections are tight and dry
- Test the GFCI outlet (if present) to confirm it’s functioning
- Contact your electrician—this suggests an electrical fault requiring professional diagnosis
Occasional tripping during high-demand periods (multiple appliances running simultaneously) is normal. Consistent tripping indicates a problem.
Water Temperature Fluctuations
If your tub heats to target temperature but then cools rapidly:
- Verify your heater is running (you should hear the heating element or see indicator lights)
- Check that the thermostat is set above current water temperature
- Ensure your cover is in place—a naked tub loses heat extremely quickly
- Inspect for leaks around drain valves or fitting connections
- If heating continues but temperature plateaus below target, your heater element may be failing—contact manufacturer support
Small temperature fluctuations (±1°C) are normal; larger swings suggest heater malfunction.
Reduced Jet Pressure
Weak jets indicate one of several issues:
- Clogged filter: Rinse or replace your cartridge
- Air in the system: After refilling, run the pump for 15-20 minutes to purge air
- Mineral buildup in jet lines: Flush jet lines using clean water
- Blocked jets: Inspect each jet valve to confirm it’s fully open
- Low water level: If water level is below the minimum fill line, add water
Systematically address each possibility before concluding the pump is failing.
Leaking Seals
Small drips from connection points are often simply loose fittings. Tighten all visible connections gently—don’t use excessive force, which can crack fittings.
If tightening doesn’t stop the leak, the seal has deteriorated. Contact Home Deluxe customer support with details about the leak’s location. Many seals can be replaced without draining the entire tub.
Discolored Water
Water discoloration suggests chemical imbalance or contamination:
- Brown/yellow water: High iron content or high chlorine; test and adjust chlorine, or consider a filter for well water
- Green water: Algae growth from low chlorine; raise chlorine to 3 ppm and maintain for 24 hours
- Cloudy/milky white: Low chlorine, high pH, or clogged filter